Sneak Peek: The 13 New Series Themes in Grow Students Volume 7

Take a look around you. What do you see? What sounds do you hear? How does the space feel to you? Your environment helps inform and store all of the information you take in about a place. It’s why a doctor’s office feels different than a concert venue — one feels clean and bright while the other feels dark and full of energy.

This isn’t just true for our favorite (or least favorite) places on earth, but it’s also true for our ministry spaces. On Sundays, we might think learning starts with the sermon, but, in reality, the process of learning begins the moment teenagers walk through our doors. So it’s probably time to be strategic about building the right environment.

In every series of Grow, we’ve crafted an engaging theme for each teaching series that complements what we’re teaching. Then, we created an environment around it. This helps tie together all of the teaching, activities, visuals and experiences your teenagers will experience, and it complements all of the Bible stories you’re sharing.

Here’s every theme you’ll find in Grow Students Volume 7 and how it connects with the series!

GOING PLACES

In August, when we’re talking about friendships in our series Going Places, we’ll base our theme on something that’s always better with friends: a good road trip!

BEYOND BELIEF

When we talk about doubt and questions in the September series Beyond Belief, we really want students to visualize themselves in the Exodus story. So all of our visuals for this series are centered on the compelling and memorable visuals we get from that story.

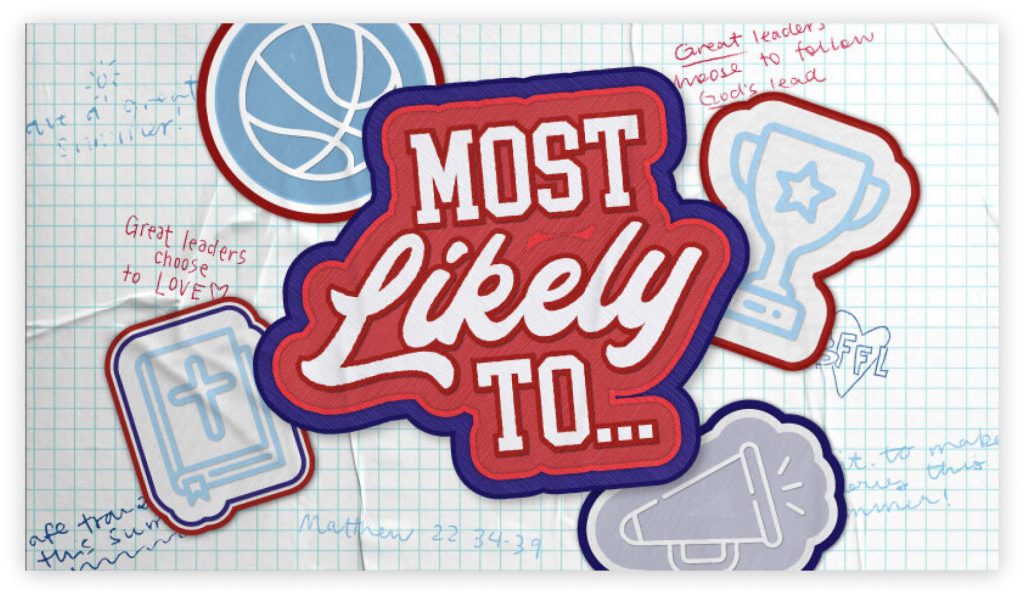
MOST LIKELY TO …

Then in October, when we talk about leadership, we’re going to use a theme that helps teenagers think about some of the ways they and their peers are already leading — at school! That’s why Most Likely To … has a really fun school spirit theme.

OVER THE TOP

For our series called Over the Top, we’ll use the theme of extreme stunts to help us think about the ways we can be “extremely” generous — but not just for show.

GRATEFUL

In December, for our Christmas series called Grateful, we’re keeping it pretty simple! The theme is Christmas gifts — but the focus, of course, isn’t on all the stuff we get. It’s about gifts that are so much better than that.

BENEATH THE SURFACE

Our identity series called Beneath the Surface has a deep sea theme. That’s because the ocean metaphor helps us explore the wonder, mystery, and sometimes fear that we experience when trying to figure out who we are and what God has for our futures.

RHYTHM

Next up is our series on spiritual growth called Rhythm. Of course, this series uses a music theme as we focus on building strong rhythms in our spiritual habits.

JUSTIFIED

In Justified, we’ll use a superheroes theme to help us process our anger in a God-honoring way — it’s full of stories of superheroes wrestling with their anger, sometimes in ways that caused harm and sometimes in ways that led to something really good.

GLOW

Our Easter series Glow uses a theme of light and darkness as we tell the story of Jesus’ death (that’s the dark part) and his resurrection (that’s the light, of course!).

ENOUGH

And since our series called Enough focuses on families, we’re using the theme of family board games to help us talk about the ups, downs, tensions, and joys that our relationships with our families can contain.

I AM

The series I Am is all about Jesus telling us who he is, in his own words. With that in mind, we’ll use a theme of sounds and sound waves to help bring that idea to life.

WORTH SHARING

Worth Sharing uses a social media theme to talk about how there are experiences and stories we’ll share with the people who mean so much to us.

NOT OKAY

Then, we wrap things up with Not Okay, which uses a puzzles and brainteasers theme, as we talk about all the problems in life that cause us stress and anxiety, and that sometimes feel impossible to solve.

That’s the plan for Volume 7 of Grow Students! No matter your curriculum, you need a strategy for your weekly environments. A great way to make your weekly environment strategic is to give it a theme that complements what you’re teaching.

If you’re using Grow Students Curriculum, we’ve already done this work for you. For every month of curriculum, we provide a monthly theme that complements the teaching content and includes everything you need to theme your program in our Environment Guides — decor ideas, editable graphics, music suggestions, games, and more!

Elevate Church Events: 5 Fun Outdoor Games for Youth Ministry

If you’re like most youth ministry leaders, you’re always looking for new ways to keep teenagers entertained. That’s a pretty important part of your role. Not only are you responsible for helping kids grow their relationship with Jesus, but you have to do it in a way that helps them connect to God and to other teenagers around them. That’s a lot to balance, but you’re not alone! All around the world, pastors and ministry leaders like you are sharing a similar burden. You’re looking for ways to create a fun, inviting environment while helping teenagers foster their relationship with Jesus.

Maybe you’re reading this and thinking, “But why games? Aren’t there other ways to have fun and help teenagers grow closer to Jesus?” Yes! There are! Games aren’t the only way to create a fun environment for teens to learn and develop their faith. You can use videos and images, lead discussions, use questions and polls, and so many things. We actually think there are 13 ways to teach teenagers effectively. Games are just one small part of creating a great environment for your teens.

Games have the unique ability to bring people together through fun. When we play games together, we build connections with people through a shared experience. A lot of our favorite memories from when we were younger are associated with the different games we played. So, we play games to create shared experiences, but those experiences are just a part of it. When we create experiences, we create connections, and those connections can help a teenager start to feel comfortable enough to share something. Talking with a group of people you don’t know can feel intimidating, but talking with a bunch of teenagers who just launched water balloons at their youth pastor? That’s something something we can all do.

Playing games and doing other activities during your weekly environment can both be key parts of making students feel welcomed and comfortable. They’re so much more than a way to entertain teenagers or fill time until they go home each week. Instead, games can serve a powerful, strategic role in your ministry, so all you need to do is find some great games to play.

To help make that search just a little bit easier, we’ve put together this list of games you could play with your teenagers and leaders the next time you see them. We’ve pulled together five great games to play outside. But, if you’re looking for something to do inside, we’ve got a great list of over 670 game ideas over in the Grow Games App. There are all types of games over there— indoor, screen, large group games, up-front games, and so many more. But you’re probably looking for that list by now, so let’s go!

THE POTTY RUNNETH OVER

This game is more than an intriguing title. It’s a way for teenagers to have an incredibly silly time. All you need are some buckets (or actual toilets, if you prefer), rolls of toilet paper, some tarp or drop cloth, bowls of water, and tape.

  • Split your group into teams and choose two players from each team to play. Then, give them a bowl of water and a roll of toilet paper.
  • Set the “toilet” buckets at some distance and lay down tape for your players to stand behind.
  • On “Go,” players will tear off toilet paper from their roll, dip it in water, and try to throw it into their toilet without stepping over the line.
  • The team who has filled their bucket with the most toilet paper by the end of the playing time wins!
  • As a variation, choose more players from the teams to play during each round.

CHARLIE AND THE CHOCOLATE FACTORY

In this game inspired by the classic movie (or the more recent one, depending on which of our team members you talk with). This is a great game to play over a large space, and you’ll simply need a few trash bags, lots of multi-colored balloons, and some candy!

  • Before you play, make some point values for the different balloons, but don’t tell anyone what they are.
  • Split your group into teams of five to six, and give each team a trash bag to hold their “candy” balloons.
  • Select two adult leaders to play the role of “Oompa Loompa” while a few of your other leaders play as “Candy Makers.”
  • On “Go,” players will run around the playing area looking for Candy Makers. Once they find a Candy Maker, they’ll receive a balloon to put in their trash bag. Then, they can return to their base to drop off the balloon or keep searching for new candy makers.
  • They’ll need to watch out for Oompa Loompas, though! If they’re caught, the team must carry out a task like making a human pyramid or answering some trivia questions. If they pass their test, they can keep going, but if they get it wrong, the Oompa Loompa takes their balloon!
  • Any balloons players drop off at base are locked in and can’t be stolen.
  • At the end of your playing time, count up the point totals using your point values. The team with the most points wins!

WATER BALLOON TIC-TAC-TOE

This is a great game to play during your water events! You’ll just need some chalk, tape, or ropes to make your Tic-Tac-Toe grid, lots of water balloons, and a balloon launcher!

  • Create a large Tic-Tac-Toe board using whichever materials suit your location best. Also, at a fair distance, make a line where you’ll launch your water balloons.
  • Split your group into teams and play rock, paper, scissors to choose which team will launch first.
  • One at a time, have teams launch a balloon towards your grid. If they land in a square, have a leader stand in the square while making an X or O, depending on the team. Be sure to give them a helmet and goggles for safety!
  • Keep taking turns launching balloons. Any time a balloon lands in a square, change the letter of the square. The first team to claim three squares in a row wins!

YOU AND ME AGAINST THE WORLD

Great friendships can survive the most challenging tests. But this dodgeball challenge is unlike any test they’ve ever been through! For this game, you’ll just need a few dodgeballs.

  • Have everyone get into pairs and select one pair to go through the challenge first.
  • Spread the rest of the players out around the area, and give the dodgeball to the team facing the challenge.
  • On “Go,” the team will kick the ball in any direction and a one-minute timer will start. If the ball is caught in the air, the round ends and no points are rewarded. If the ball lands, the other players must work together to try and throw the ball at the competing pair.
  • Once the ball is kicked, the pair must run around the area, either together or separately, trying to avoid getting hit with the dodgeball. If they’re hit, they must freeze until their partner tags them. If both players are hit, the round is over.
  • Players receive points for every team member who isn’t frozen at the end of the one-minute round.
  • Play as many rounds as you can, and consider adding more dodgeballs to increase the difficulty!

ONE-MAN KICKBALL

Kickball is a great team sport to play with your teenagers, but what would happen if a team only started with one player? For this kickball remix, you’ll only need a kickball and some hula hoops to use as bases.

  • Start by choosing one person to pitch for the whole game. This person won’t get a chance to kick the ball, so choosing a leader might be best.
  • Set out your bases to make a kickball diamond, and have everyone but the pitcher line up in a straight line a few feet from home plate. Be sure to write down your lineup because once the ball is kicked, it might be hard to get players back into the right order.
  • Have the pitcher roll the ball to the first kicker. Once the ball has been kicked, every player starts running around the bases, trying to get back to home plate before the pitcher can tag them with the ball.
  • The pitcher must retrieve the ball and tag players running the bases. Any player that is tagged joins the pitcher’s team, and the last player remaining wins the game!
  • Once all of the players have crossed home plate, get the lineup back in order, and the next person gets to kick the ball!

These are just a few of the awesome games you can play with your teenagers any time you’re outdoors with them. But the ideas don’t stop here! Inside the Grow Games App, you’ll find over 670 different games you can play with in your youth ministry. Each game comes with instructions, editable graphics, and a supply list! Let us make it easier for you to create shared experiences with your teenagers, and download the Grow Games App today!

6 Ways to Make a Stage Backdrop

Whether your ministry meets in a single classroom, a large theater with a stage, or that DIY video studio you made to help you through the pandemic, we all want our spaces to look good, right? If your space looks thrown together or run down, it can distract the kids and teenagers in your group – which completely defeats the point of your large group teaching strategy.

One simple way to keep your ministry space looking fresh and interesting is to create a backdrop that’s easy to update when you start a new teaching series or need a new look. There are countless ways to create versatile backdrops for your rooms or stages, but we love the following six methods because they’re so easy to update.

Free PDF Resource
6 Ways to Make Your Own Stage Backdrop
Explore 6 easy church stage design ideas to enhance your ministry's visual appeal and engagement.

To figure out which backdrop is right for you, here are some things to think about:

  • How much budget do you have to work with?
  • How often do you want to update your backdrop?
  • How much time do you want to spend updating it?
  • How often does it need to be torn down and set up again?
  • Where will you store your backdrop when it’s not in use?

Once you’ve got answers, it’s time to choose a backdrop!

1. FOAM BOARDS

Did you know your favorite hardware store sells foam insulation boards? They usually come in 4′ x 8′ panels (with varying thicknesses) and are lightweight, cheap, and super versatile. They can be painted, spray painted, covered in fabric, stuck with push pins, or covered in adhesive textured wall panels. They even come pre-scored, so they’re easy to snap apart into smaller sizes (although we recommend using a craft knife to score them first to ensure your snapping is accurate). We suggest panels that are 1″ or 2″ thick, so they stand up on their own without bending or snapping. There are plenty of ways to make these boards stand upright, but here are two methods we like:

  1. A WOODEN STAND: 3 pieces of wood, some nails or glue, and a bit of paint will get you a simple stand to keep your foam boards upright. Check out the illustration above for a visual — but keep that slot for the boards snug, so they don’t tip over! The boards are foam, so they’ll squish into place.
  2. AN ACCORDION FOLD: Place 3 or more boards next to each other, with a small amount of space between them, so they have room to fold. Use duct tape to bind the boards together and then stand them upright, adjusting the angle of each board until it stands upright on its own.

2. PLYWOOD PANELS

If you’re up for some basic carpentry, you might try making a few freestanding wall panels with plywood and lumber. These panels will be much more durable than the foam boards, but they’ll also be heavier and more difficult to make, move, and store. Like the foam boards, they can be painted, spray painted, covered in fabric, or covered in adhesive textured wall panels. Plus, you can nail things to them and hang objects from them without fear of them tipping over.

Because these plywood wall panels will be heavy, it’s important that they’re built carefully and securely and that they’re properly weighted, so they don’t tip over. If you’re new to carpentry, we suggest asking someone in your congregation who’s familiar with carpentry to build these for you.

We’re not exactly carpentry experts either, so we’ll let someone else give you a tutorial on how to build these so you can see what you’re in for. Here are a bunch of tutorial videos on how to make these. They’re often called theater flats or stage flats since they’re typically used in productions.

3. CARDBOARD BOXES

Yes, cardboard boxes! They’re free, light, and versatile. They can be painted, spray painted, covered in fabric, wrapped in wrapping paper, and stacked to build anything from a wall to a cityscape, classic 8-bit video game characters, or a stack of oversized Christmas presents.

Refrigerator boxes are your best bet for a tall backdrop, but don’t be afraid to experiment with boxes in different sizes and shapes. Keep repainting or re-wrapping them until they fall apart — then go get some new ones!

4. VINYL BANNERS

Because of the cost, you probably don’t want to print vinyl banners for every teaching series you do, but banners can be a great solution when you need a backdrop that you plan to reuse or leave standing for a long period of time. Print your backdrop design on the banners, stretch them out on banner stands, and you’re done!

These banners are lightweight, durable, and easy to set up and tear down, so they’re great for portable churches and multipurpose spaces.

5. WIRE FENCING

Wire fencing is a great solution if you’d prefer a semi-transparent backdrop rather than something large and solid. From it, you can hang lights, banners, and decorative objects and easily change your look without spending a fortune or tons of time creating something new. You can purchase pre-made grid units on Amazon, but if you’d like a more custom size, you can make your own instead.

Your local hardware store should sell a variety of wire or metal fencing in different shapes and thicknesses. While you might be able to find a large framed section of fencing in the size you’d like, it’s more likely you’ll need to build your own frame with two-by-fours and stretch the wire fencing across the frame. If you’re not particularly skilled at building things, ask someone in your congregation or community who is handy to build this for you. You get an awesome wire fencing unit, and they get to participate in your ministry. It’s a win-win!

6. WOOD PALLETS

Okay, okay, okay — we know. You might be sick of wooden pallets. At some point, it seemed like every pastor on planet earth was preaching in front of a stack of rustic pallets. But that doesn’t change the fact that they’re awesome! Pallets are durable, stackable, and free! You can paint them, wrap lights or garland around them, and nail things to them without spending money on materials. Just drop by your favorite grocery store and snag a stack from the area next to the dumpster. Oh, but if you plan on stacking these, ensure they’re stacked and mounted securely. You don’t want these falling over on anyone!

Okay, there you have it! Now you’ve got six ways to build your own stage backdrop for your ministry — in a way that’s affordable, flexible, and totally doable.

And hey, if you’re using Grow Curriculum for your youth or kids ministry, these backdrop ideas will work great with the decor ideas we provide with each teaching series! Check your Environment Guide for each teaching series for decorating ideas. And if you want to learn more about the Grow Annual Environment Strategy, check out this article for a walkthrough!

Free PDF Resource
6 Ways to Make Your Own Stage Backdrop
Explore 6 easy church stage design ideas to enhance your ministry's visual appeal and engagement.

15 No-Prep Indoor Games for Your Church’s Children’s Ministry

If you’re like most kids ministry people, you probably have a love/hate relationship with games. They’re a necessary ingredient to an engaging kids service, but between the supplies, the prep, and the instructions, they can take so much effort. We get it. So here are 15 games you can play any time with almost no supplies or preparation needed. Have fun!

HEAD, SHOULDERS, KNEES, CUP

You can play this simple game with just a few students upfront or with your whole group. All you need are some disposable cups.

  • Split everyone into pairs. Put a cup on the floor between each pair.
  • Call out a series of commands (“Head! Shoulders! Knees!”) and have kids place their hands on the part of their body you just shouted.
  • To end the round, yell, “Cup!” The first person from each pair to grab the cup from the ground wins.
  • Keep playing until only one player remains.

POCKET SCAVENGER HUNT

Make a list ahead of random objects kids or leaders might have on them (like a shoe, sock, crayon, or phone). Then…

  • Split into teams that include both kids and adults.
  • Call out items, then award a point to each team for every item they can find.
  • You could also play this game, “alphabet style,” where each team must find an object that starts with each letter of the alphabet. (This version works best for older kids who can spell.)

SIT DOWN IF …

In this game, you’ll call out a series of commands starting with, “Sit down if…” You don’t need to prep anything for this game, but you can make a list of ideas, so you don’t need to make them up on the spot.

  • Have everyone stand up.
  • Call out a series of “sit down” commands until only one person remains. You might tell them to sit down if they are wearing a blue shirt, have their hair in a ponytail, have a younger sibling, or if they ate cereal for breakfast.

HEADS OR TAILS

All you need for this game is a single coin. Then…

  • Have everyone stand up.
  • Ask them to pick heads or tails. If they choose heads, they’ll need to put their hands on their heads. If they choose tails, they must put their hands on their hips.
  • Flip the coin.
  • If it’s heads, all the heads win and advance to the next round, and the tails are out, or vice versa. Keep playing until one or a few kids remain.

THIS OR THAT

This is a spin on the classic game Simon Says, except the leader says, “Do this …” instead of, “Simon says …”

  • When the leader starts a command with, “Do this,” the kids should repeat it, but if the leader starts a command with, “Do that,” the kids should stay motionless. If a kid misses a motion, they sit down.
  • Move fast and add fun motions, like jumping jacks, patting your head, spinning in circles, or quacking like a duck.
  • Keep playing until there are only a few winners left.

BEACH BALL (OR BALLOON) TOSS

For this game, you only need a few balloons or beach balls from your storage closet. You can play with any number of students.

  • Split kids into teams.
  • Tell everyone their feet are frozen to the floor and can’t be moved.
  • Toss a balloon or beach ball to each team. See which team can bat it and keep it in the air the longest without moving their feet.

SWITCH IT UP

All you need for this game is a nice open space.

  • Split kids into two teams. Have them all stand in a line against a wall.
  • Call out random facts like, “You love ice cream” or “You’ve been to the beach.” If the fact applies to them, have them switch walls and run to the other side.
  • There’s no winner in this game! Keep playing until everyone’s tired, or you’re out of facts.
Free PDF Resource
15 No-Prep Indoor Games for Your Church's Children's Ministry
Discover 15 easy indoor games for children's ministry in our guide. No prep needed, just fun!

4 CORNERS

All you need for this game is a room with four corners.

  • Assign a number to each corner of the room.
  • Choose one person to be “it” and have them stand in the center of the room with their eyes closed (or wearing a blindfold).
  • Have them count to 20 while everyone else runs to one of the room’s four corners. After the countdown, everyone must freeze.
  • The person who’s “it” calls out a number, and everyone in that corner is out.
  • Keep playing until a few kids or one kid wins.

ONE HAND, TWO HANDS, NONE

  • Have everyone stand up facing the front of the room.
  • Choose one kid to join the leader at the front. Have them stand with their back to the crowd.
  • Have everyone in the crowd put one hand, two hands, or no hands in the air. After a few seconds, shout, “Freeze!”
  • Have the kid at the front of the room choose if they’ll be put one hand, two hands, or no hands in the air.
  • Everyone whose hands match their position stays in, while everyone else is eliminated.

CROWD CHARADES

Crowd Charades is just like regular charades, but reversed. In this version of the game, one person is the guesser while the entire crowd silently acts out clues.

  • Send the guesser out of the room while you give the crowd the clue they will act out.
  • Bring the guesser back into the room and give them 15-30 seconds to guess what the crowd is acting out.

LINE UP

  • Split your kids into teams of equal size of about five kids each.
  • Call out a series of commands that will allow each team of kids to line up in a specific order.
  • Start with something easy, like “Line up from shortest to tallest!” Then, move to more challenging things like grade, birthday, shoe size, number of states or countries they’ve visited, or the last letter of their last name.
  • To level up the game even further, have kids play without talking.
  • The first team to finish lining up wins that round.

SECRET LEADER

  • Send one person out of the room. They’ll be the guesser.
  • Have everyone else stand in a circle and choose one person to be the secret leader. Explain that they’ll do a series of any actions they’d like (jumping jacks, patting their head, squatting, clapping, yawning, etc.), and everyone else in the group will follow while the guesser tries to guess who the secret leader is—so they’ll need to be sneaky!
  • Call your guesser back into the room. Give them three guesses (but unlimited time) to guess who the leader is.

EVERYONE’S IT

This is played just like tag…except everyone is “it”! In this version, everyone runs around chasing each other. When someone gets tagged, they’re out. Keep playing until there’s only one person left. This game usually goes quickly, so be prepared to play multiple rounds. You can level up this game by having kids hop or crab walk instead of running.

CAT & MOUSE

You’ll need blindfolds and a pool noodle from your storage closet for this game!

  • Have everyone stand in a big circle.
  • Choose one kid to be the cat and one to be the mouse.
  • Blindfold them both and give the cat a pool noodle.
  • Have the cat roam around the circle, trying to tag the mouse with the pool noodle. Since they are both blindfolded, they won’t be able to see each other, so have the students stand in a circle to protect them so they don’t run into anything.
  • Once the cat tags the mouse, select a new group of kids to play.

SCREAM RACES

You probably only want to play this game if you’re a reasonable distance from any of your adult services because it gets noisy!

  • Choose a few kids to play. Have them line up on one end of the room.
  • When you say “go,” have them take a big breath and let out a big yell as they start running toward the other side of the room.
  • When they run out of breath, they have to freeze wherever they stop yelling. Whoever makes it the furthest is the winner! If your room is smaller, have them run back and forth from one end to the other.

There are so many fun games to play with minimal prep work, and for more low- or no-prep games, check out the Grow Games app. Inside the app, we have over 670 different games for your kids ministry. Each game comes with instructions, a supply list, and editable graphics so you can be ready to play with your kids. Plus, you can add your own games to build up a database of all the great games you’ve been playing in your kids ministry. So, instead of randomly searching online for your next great game, just download the Grow Games app instead!

Free PDF Resource
15 No-Prep Indoor Games for Your Church's Children's Ministry
Discover 15 easy indoor games for children's ministry in our guide. No prep needed, just fun!

15 No-Prep Indoor Games for Your Church’s Youth Ministry

If you’re like most youth ministry people, you probably have a love/hate relationship with games. They’re a necessary ingredient to an engaging youth service, but between the supplies, the prep, and the instructions, they can take so much effort. So, you end up rotating through the same list of five games. We get it. That’s why we’ve made you this list of 15 games you can play any time with almost no supplies or preparation needed. Have fun!

HEAD, SHOULDERS, KNEES, CUP

You can play this simple game with just a few students upfront or with your whole group. All you need are some disposable cups.

  • Split everyone into pairs. Put a cup on the floor between each pair.
  • Call out a series of commands (“Head! Shoulders! Knees!”) and have the students place their hands on the part of their body you just shouted.
  • To end the round, yell, “Cup!” The first person from each pair to grab the cup from the ground wins.
  • Keep playing until only one player remains.

FIVE SECOND RULE

In this upfront game, students will have five seconds to name five items related to a random topic.

  • Split the room into two teams and select one person from each team to compete.
  • Decide which team will go first and then call out a random topic like social media apps, countries in South America, or flavors of ice cream.
  • If it is a player’s turn, they have five seconds to name five items in the category.
  • If they are successful, they win a point for their team. Otherwise, the point goes to the other team.
  • You can play for a specific amount of time or until a team hits seven points.

SIT DOWN IF . . .

In this game, you’ll call out a series of commands starting with, “Sit down if…” You don’t need to prep anything for this game, but you can make a list of ideas, so you don’t need to make them up on the spot.

  • Have everyone stand up.
  • Call out a series of “sit down” commands until only one person remains. You might tell them to sit down if they are wearing a blue shirt, have their hair in a ponytail, have a younger sibling, or if they ate cereal for breakfast.

HEADS OR TAILS

All you need for this game is a single coin. Then…

  • Have everyone stand up.
  • Ask them to pick heads or tails. If they choose heads, they’ll need to put their hands on their heads. If they choose tails, they must put their hands on their hips.
  • Flip the coin.
  • If it’s heads, all the heads win and advance to the next round, and the tails are out, or vice versa. Keep playing until one or a few students remain.

COMPETITIVE HIGH-FIVING

For this game, you only need a small ball (ping pong ball, foam dodgeball, etc.)

  • Select two players who think they can beat gravity.
  • Have one player start with the ball.
  • In the first round, players must toss the ball to their partner and, using one hand each, they must high-five one time before catching the ball again.
  • If they get it, then they must high-five two times in the second round. Continue raising the number of high-fives with each round.
  • If the ball hits the ground at any point, the players are out, and new players can take their place, starting from the first round.
  • Play until a team reaches ten high-fives.

THE 25

All you need for this game is an open space.

  • Split your group into teams and have at least one adult leader in each group.
  • Have each group form a circle, and tell them they can’t speak again until the game starts.
  • The goal of the game is to count from 1-25, with each player saying only one number at a time and without making a noticeable pattern.
  • They will have to start again if they are caught using a pattern. And if any players speak at the same time, the group must start again.
  • When you say “Go,” have each team start counting, and the first team to count all the way to 25 wins!

POOL DECK

In this game, you just need a large open space.

  • Set your playing area into three sections. On one end, there’s the “top deck.” In the middle, there’s the “mid-deck.” On the end opposite the top deck is the “pool deck.”
  • Have all your students start in the mid-deck area. Then, shout out a new area on the field. Students must race to that section and avoid being one of the last three players in the section. If they are, they are out.
  • Play until only one to five students remain.

4 CORNERS

All you need for this game is a room with four corners.

  • Assign a number to each corner of the room.
  • Choose one person to be “it” and have them stand in the center of the room with their eyes closed (or wearing a blindfold).
  • Have them count to 20 while everyone else runs to one of the room’s four corners. After the countdown, everyone must freeze.
  • The person who’s “it” calls out a number, and everyone in that corner is out.
  • Keep playing until a few students or one student wins.

THE HEIST

For this game, you just need a large playing space and a few random objects from your storage closet (Like a trophy, a clean plunger, a pool noodle, etc.).

  • Have a leader stand on one end of the room with one of the random objects. Have all your students start on the other side of the room.
  • When you say “Go,” students will try to sneak across the room to grab the object quietly. However, while they are sneaking, the leader can slowly turn around.
  • If a player is caught moving while the leader is looking, the object must be returned, and all students must return to the beginning.
  • Once a team has grabbed the object, they must work together to get it back to the beginning side without the leader seeing the object. While looking, the leader can guess who has the object and, if correct, it must be returned, and the game starts over again.
  • Play for a set amount of time, or until a team gets an item back one time, or until you run out of new objects to play with.

CROWD CHARADES

Crowd Charades is just like regular charades, but reversed. In this version of the game, one person is the guesser while the entire crowd silently acts out clues.

  • Send the guesser out of the room while you give the crowd the clue they will act out.
  • Bring the guesser back into the room and give them 15-30 seconds to guess what the crowd is acting out.
  • Once the round is over, select a new guesser and play again.
Free PDF Resource
15 No-Prep Indoor Games for Your Church's Youth Ministry
Engage your youth ministry with 15 No-Prep Indoor Games for ministry fun. Free on Grow Games App. Easy, quick, and enjoyable!

LINE UP

You don’t need supplies to play this game!

  • Split your group into teams of equal size.
  • Call out a series of commands that will allow each team of students to line up in a specific order.
  • Start with something easy, like “Line up from shortest to tallest!” Then, move to more challenging things like grade, birthday, shoe size, number of states or countries they’ve visited, or the last letter of their last name.
  • To level up the game even further, have them play without talking.
  • The first team to finish lining up wins that round. Then, select a new category and play again.

SIGNS

You don’t need anything to play this game!

  • Have your group sit or stand in a circle, but you may want to have smaller groups for the first couple of rounds.
  • Give everyone a chance to choose their own unique sign, which can be a motion or movement like touching their hair, pulling an ear, or a quick wave.
  • Go around the circle and have each player demonstrate their sign.
  • Choose one person to start in the center as the “guesser.” Have them close their eyes while you select one person to start the game.
  • Once the game starts, the first student must secretly pass the sign by making their own sign and then the sign of the player they’d like to pass to.
  • The guesser must try and correctly guess who holds the sign. If the guesser is right, the group chooses a new guesser and plays again.

ASSASSIN TAG

For this game, you only need some small scraps of paper and a few pens.

  • Have everyone place their name and last initial on a scrap of paper and hand it to you. Then, shuffle the papers and hand each person a new paper. Make sure they don’t receive their own name. This will be their target.
  • Then, have each player spread out around the room.
  • On “go,” players must attempt to tag their target without being tagged by their own assassin. If they’re able to tag their target, then the tagged person must hand over their current target paper.
  • The student who collects the most targets wins.

SARDINES

You don’t need anything other than a large space with lots of hiding spots.

  • Sardines is played like reverse hide-and-seek. Start by giving one player, “the sardine,” 30 seconds to hide within the playing area.
  • Then, get a headcount of every person playing and set a time limit for the round.
  • After your 30-second countdown, send your group to find the player. But, instead of returning the hiding player back to the camp, any students who find them will hide with them.
  • Play until all students find the sardine or until time runs out. The first player to find the sardine gets to hide in the next round.

FINISH THE LYRIC

You’ll just need a phone with music for this game.

  • Select three players to compete against each other and choose an order for turns.
  • Then, have one player choose a genre of music. Select an appropriate, popular song from that genre.
  • Play a clip of the song before pausing it suddenly and randomly. Once paused, the first player has five seconds to continue singing the line of the song. If they get it right, they stay in the round and earn a point for their team. If they sing incorrect lyrics or don’t start on time, they lose the round and must switch out with someone else.
  • Once a player has gone, resume the music and pause at a random point for the next player to sing. Continue until all three players have had a chance to finish the lyric. Then, choose a new genre and a new song before starting again in reverse order.

There are so many fun games to play with minimal prep work, and for more low- or no-prep games, check out the Grow Games app for Android or Apple. Inside the app, we have over 670 different games for your youth ministry. Each game comes with instructions, a supply list, and editable graphics so you can be ready to play with your teenagers. Plus, you can add your own games to build up a database of all the great games you’ve been playing in your youth ministry. So, instead of randomly searching online for your next great game, just download the Grow Games app instead!

Free PDF Resource
15 No-Prep Indoor Games for Your Church's Youth Ministry
Engage your youth ministry with 15 No-Prep Indoor Games for ministry fun. Free on Grow Games App. Easy, quick, and enjoyable!

An Annual Strategy for Creating Engaging Youth Ministry Environments

We all want to teach students about Jesus more effectively, but let’s be honest — it’s not always easy. It’s challenging enough to teach adults, but to teach teenagers whose brains are in different stages of development than our own is a challenge most of us were never really trained to do.

When we think about how to teach teenagers effectively, we probably jump immediately to thinking about our sermons or lessons. The truth is, the process of learning should begin the moment teenagers walk through our doors. If that’s the case, then we need to get strategic about the structure of our environment as a whole — the room design, props, graphics, snacks, and everything else.

It’s a lot to do and think about, but if this idea still feels a little overwhelming, don’t stress — we’re going to share how we’ve structured all of this in Grow Students Curriculum. But don’t worry if you’ve never used Grow Students in your ministry before. You can still steal our strategy! Take the ideas you find helpful, ignore the parts that don’t quite fit your context, and combine them with the unique language, vision, and strategy of your church.

Now, let’s talk about our weekly environments strategy for youth ministry! We’ll start with the big picture and then get more specific as we go.

1. PLAN FOR THE YEAR

Before you can plan your weekly environment themes for the year, you’ll need to plan what you’re teaching for the year! That’s because your weekly environment should always complement what you’re teaching — not dictate or compete with it. So if you haven’t already, take a look at this article about planning your annual teaching strategy. When you’ve got a plan for your teaching nailed down, come back!

…Are you back now?

Okay, cool! Let’s keep going.

An Annual Strategy for Creating Engaging Youth Ministry Environments
Free PDF Resource
An Annual Strategy for Creating Engaging Youth Ministry Environments
Create engaged ministries for students with Grow Curriculum's annual strategy for creating engaging youth ministry environments.

Now that you know what you’re teaching all year long, you here’s how to put a strategy around your weekly environments: determine an engaging theme for each teaching series that complements what you want teenagers to learn. Then create an environment around it!

Having distinct monthly themes isn’t just for fun. (But yeah, they do make things a lot more fun.) These monthly themes help teenagers learn in a lot of different ways! When you have a monthly theme that ties all of your teaching, activities, visuals, and experiences together and complement the Scripture you’re studying, here’s how it can make your teaching more effective

  • A new theme for each teaching series signals to teenagers it’s time for a new topic, which reengages their attention.
  • The right theme makes Scripture more understandable and relatable to a young person born in the 21st century!
  • A good theme helps you get more creative with the types of object lessons, activities, visuals, stories, and whatever else you like to use to help capture and keep a teenager’s attention.
  • And yes, a monthly theme really is fun! Fun isn’t something to be afraid of. When teenagers are having fun, they learn better. So make your themes fun!

So what might a year of themes look like? The themes you choose for your teaching shouldn’t be random pairings of ideas (like video games and Joshua, or emojis and the Gospels) without a good explanation. Instead, the themes you choose should directly complement your teaching in a way that makes the stories come alive and the principles take root. You might try …

  • A music theme to talk about creating new rhythms with our spiritual disciplines.
  • A road trip theme when you explore how our friendships impact the direction of our lives.
  • A superheroes theme to talk about how Jesus calls us to fight for justice in the world.
  • Or maybe, when you’re studying a story or book of the Bible with a specific setting, you let the imagery of that passage become your theme, like the imagery we find in Exodus, Jesus’ parables, or the creation story.

If you typically start a new teaching series every 3-4 weeks, that means you’ll need a total of 12-13 themes each year. And when you’re deciding on your themes for the year, it’s probably a good idea to find a balance between …

  • Keeping your themes new and fresh so students don’t get bored by seeing the same themes over and over again.
  • Reusing supplies so you’re not filling your storage room with stuff you’ll never use again.

To learn more about how to do this well, check out this article about planning your annual ministry calendar. There’s a video walkthrough in there for you too!

2. PLAN FOR EACH SERIES

Once you know your theme for the teaching series, you can start building the rest of your physical environment. But keep in mind, the older your students are, the easier it is to trigger their “cheesy” alarms. So as you build out your monthly theme, be careful not to be gimmicky. While your younger middle schoolers might love it, being too themed-out is an easy way to lose your high schoolers!

Remember, your teenagers are probably not that interested in silly characters and tons of over-the-top decorations. Rather, they’re looking for an environment that makes them feel welcome, safe, and cared for. So as you incorporate your series theme into your weekly environment, do just enough to make it fun and memorable — but not so much that you leave everyone rolling their eyes at you. (Well, actually, they’re teenagers, so the eye rolls aren’t always preventable.)

When building out a monthly theme, here are a few things you could consider:

  • ROOM DESIGN: Whether you’ve got a whole room, a single wall, or a big stage at your disposal, there’s probably something you can do to add interest and a theme to the room where your youth ministry meets. If you’re using Grow Students Curriculum in your ministry, you know we provide a handy little Environment Guide for every teaching series that comes with images, instructions, and supply lists for a room design that will complement the theme of each series. But if you’re not using Grow, that’s okay! If you need some help thinking of ways to decorate your physical space, check out this article on 6 ways you can build your own backdrop.
  • MUSIC: From worship music, to your background playlists, to any special songs you use during times of reflection or response, your monthly topic and theme can help inform the songs you choose too. (And yes, if you’re using Grow Students, we make these song lists for each series for you too!)
  • GRAPHICS & VIDEOS: And lastly, your graphics and videos can help reinforce your monthly theme too! When all of your images and videos stay in line with your monthly theme, it helps create a more immersive experience for students. Grow gives you tons of videos and images — we even give you all the editable files so you can make whatever visuals you need that we didn’t provide!

None of these fancy visuals could ever compare to the importance of the biblical truths you’re teaching, of course! So it’s important to keep all of this in perspective. If you’re looking to create a more fun, themed monthly experience for teenagers, this checklist will help you find new ways to integrate your theme into your weekly environment. But even if you never get a chance to decorate your space, you can still create a weekly environment for teenagers that makes a big impact. Let’s talk about how.

3. PLAN FOR THE WEEK

If we’re going to create effective and meaningful weekly environments for teenagers each week, we can’t just talk about your physical environment, decorations, and fun stuff. We’ve got to talk about the physical, emotional, and relational environment you’re creating each week too. The environments we create each week are so important, they can actually make or break whether or not young people receive the message we’re trying to share with them.

We’ve talked a lot already about the decorations, music, and physical space that goes into creating a weekly environment, but it’s so much bigger than that. It’s about creating environments that help everyone feel welcome in your church, and that reinforce what you’re teaching.

For teenagers, that means focusing on having fun through games and humor, asking questions instead of making assumptions, explaining anything that feels like insider language or information, and acknowledging there are people in the room who may not be familiar with church or don’t yet believe. So each week, think about what kind of environment you’re creating, beyond just the decorations.

  • Is your environment physically safe?
  • Is it emotionally safe?
  • Is it fun?
  • Is it loving?
  • Is it inclusive of young people with disabilities?
  • Is it welcoming to teenagers of diverse backgrounds, family structures, cultures, and experiences?
  • In short, is your weekly environment a place teenagers want to be?

We hope so! Because teenagers struggle to learn or open up when they feel uncomfortable, unsafe, misunderstood, or bored. (And let’s be honest — we’re grown-ups, and we probably struggle with those things too.) But when teenagers feel welcome and safe, they are more free to learn! So be strategic about the environments you’re creating for teenagers. They might just be the key to helping them know Jesus better.

This is a lot to think about and plan for, we know — but if your strategy around creating compelling weekly environments will ultimately help teenagers get to know Jesus better, then it’s so worth it!

In case you missed it, check out this article about planning an entire year of ministry. It’ll show you how this weekly environments strategy could look on your annual calendar, alongside an annual strategy for your:

We’ve said this before, but we’ve got to say it again! These ideas we’ve talked about are nice … but these ideas only become a strategy when you put them on your calendar and turn them into actions.

When you have an annual plan to turn your ideas and goals into a strategy, you’ll make a much bigger impact.

And hey, if you’re using Grow Students Curriculum, we’ve already done some of this work for you. For every teaching series, we provide a monthly theme that complements the teaching content and includes everything you need to theme your program in our Environment Guides — decor ideas, editable graphics, music suggestions, games, and more!

But whether you use Grow Curriculum or not, we hope you’ll steal our strategy! We developed it over lots of years of ministry, with input from lots of church leaders and lots of trial and error. Take it, tweak it, and make it your own. We really hope it helps you be just a little more awesome at what you do this year!

An Annual Strategy for Creating Engaging Youth Ministry Environments
Free PDF Resource
An Annual Strategy for Creating Engaging Youth Ministry Environments
Create engaged ministries for students with Grow Curriculum's annual strategy for creating engaging youth ministry environments.
An Annual Strategy for Creating Engaging Children’s Ministry Environments

We all want to teach kids about Jesus more effectively, but let’s be honest — it’s not always easy. It’s challenging enough to teach adults, but to teach kids whose brains are in different stages of development than our own is a challenge most of us were never really trained to do.

When we think about how to teach kids effectively, we probably jump immediately to thinking about our sermons or lessons. The truth is, the process of learning should begin the moment kids walk through our doors. That’s why we need to get strategic about the structure of our environment as a whole — the room design, props, graphics, snacks, crafts, and everything else!

It’s a lot to do and think about, but if this idea still feels a little overwhelming, don’t stress — we’re going to share how we’ve structured all of this in Grow Kids Curriculum. But don’t worry if you’ve never used Grow Kids in your ministry before. You can still steal our strategy! Take the ideas you find helpful, ignore the parts that don’t quite fit your context, and combine them with the unique language, vision, and strategy of your church.

Now, let’s talk about our weekly environments strategy for children’s ministry! We’ll start with the big picture and then get more specific as we go.

1. PLAN FOR THE YEAR

Before you can plan your weekly environment themes for the year, you’ll need to plan what you’re teaching for the year! That’s because your weekly environment should always complement what you’re teaching — not dictate or compete with it. So if you haven’t already, take a look at this article about planning your annual teaching strategy. When you’ve got a plan for your teaching nailed down, come back!

…Are you back now?

Okay, cool! Let’s keep going.

Free PDF Resource
An Annual Strategy for Creating Engaging Children's Ministry Environments
Create engaged ministries for kids with Grow Curriculum's annual strategy for creating engaging children's ministry environments.

Now that you know what you’re teaching all year long, you here’s how to put a strategy around your weekly environments: determine an engaging theme for each teaching series that complements what you want kids to learn. Then create an environment around it!

Having distinct monthly themes isn’t just for fun. (But yeah, they are pretty fun.) These monthly themes help kids learn in a lot of different ways! When you have a monthly theme that ties all of your teaching, activities, visuals, and experiences together and complement the Bible stories you’re sharing, here’s how it can make your teaching more effective

  • A new theme for each teaching series signals to kids it’s time for a new topic, which reengages their attention.
  • The right theme makes the stories and ideas from Scripture more understandable and relatable to a kid born in the 21st century!
  • A good theme helps you get more creative with the types of object lessons, activities, visuals, characters, and whatever else you like to use to help capture and keep a kid’s attention.
  • And yes, a monthly theme really is fun! Fun isn’t something to be afraid of. When kids are having fun, they learn better. So make your themes fun!

So what might a year of themes look like? The themes you choose for your teaching shouldn’t be random pairings of ideas (like video games and Noah’s ark, or emojis and the Gospels) without a good explanation. Instead, the themes you choose should directly complement your teaching in a way that makes the stories come alive and the principles take root. You might try …

  • A nature theme to go with your series on Creation.
  • A rocket ship theme to talk about “launching” your faith to new heights.
  • An underwater theme to symbolize going deeper in your faith.
  • A party theme to go with a series about praise and worship.

If you typically start a new teaching series every month, that means you’ll need a total of 12 fun monthly themes each year. And when you’re deciding on your themes for the year, it’s probably a good idea to find a balance between …

  • Keeping your themes new and fresh so kids don’t get bored by seeing the same themes over and over again.
  • Reusing decorations and supplies so you’re not filling your storage room with stuff you’ll never use again!

To learn more about how to do this well, check out this article about planning your annual ministry calendar. There’s a video walkthrough in there for you too!

2. PLAN FOR THE MONTH

Once you know your theme for the month, you can start building the rest of your environment — things kids will experience from the time your program begins until they go home.

When building a monthly theme, here are a few elements you should consider tying into that theme:

  • ROOM DESIGN & DECOR: Whether you’re decorating the walls of your classroom, a bulletin board, or a whole stage, decorating is a big deal in children’s ministry! If you’re using Grow Kids Curriculum in your ministry, you know we provide a handy little Environment Guide for every teaching series that’s packed with tons of images and links to do-it-yourself decorations, Amazon products, and more, to help your room decor really bring your theme to life.
  • PROPS: From object lessons and visuals that help kids better understand the Bible story, to silly costumes and things to make kids laugh, your props can tie into your monthly theme too!
  • CRAFTS: Sometimes a craft can be just for fun, sometimes it can help kids remember a Bible story, and sometimes it can help them turn what they’ve learned into an action step. No matter what kind of crafts you’re planning, consider how your monthly theme can influence what kids will be making.
  • SNACKS: Sure, you can always get away with the classic Goldfish or generic-branded-Oreos Sunday school snacks … or … you could have a little more fun with your snacks! Whether it’s animal-shaped cookies for your lesson on Noah’s ark, popsicles for your tropical-themed Christmas series, or fish-shaped fruit sliced or cookies for a lesson about Jesus feeding the 5,000, try having a little more themed-up fun with your snacks once in a while!
  • GIVEAWAYS: Once in a while (maybe at the start or end of a teaching series) you may want to give every kid a little something fun to take home. Whether it’s a sticker, temporary tattoo, fidget toy, or party favor, this is another way to reinforce your monthly theme, instead of just handing out something random!
  • MUSIC: From worship music, to your background playlists, to silly songs you cover or parody for kids, your monthly theme can help inform the songs you choose too.
  • GRAPHICS & VIDEOS: And lastly, your graphics and videos can help reinforce your monthly theme too! When all of your images and videos stay in line with your monthly theme, it helps create a more immersive experience for kids.

None of these things are as important as the Bible stories and truths you’re teaching kids, of course! So it’s important to keep all of this in perspective. If you’re looking to create a more fun, themed monthly experience, this checklist will help you find new ways to integrate your theme into your weekly environment. But even if you never plan a single on-theme craft, prop, or giveaway, you can still create a weekly environment for kids that makes a big impact. Let’s talk about how.

3. PLAN FOR THE WEEK

If we’re going to create effective and meaningful weekly environments for kids each week, we can’t just talk about your physical environment, decorations, and fun stuff. We’ve got to talk about the physical, emotional, and relational environment you’re creating each week too. The environments we create each week are so important, they can actually make or break whether or not kids receive the message we’re trying to share with them.

We’ve talked a lot already about the decorations, music, and physical space that goes into creating a weekly environment, but it’s so much bigger than that. It’s about creating environments that help everyone feel welcome in your church, and that reinforce what you’re teaching.

For kids, it means focusing on having fun through age-appropriate games and play, using all of their senses, and prioritizing safety so kids are free to learn and grow. So each week, think about what kind of environment you’re creating, beyond just the decorations.

  • Is your environment physically safe?
  • Is it emotionally safe?
  • Is it fun?
  • Is it loving?
  • Is it inclusive of kids with disabilities?
  • Is it welcoming to kids of diverse backgrounds, family structures, cultures, and experiences?
  • In short, is your weekly environment a place kids love to be?

We hope so! Because kids struggle to learn when they feel uncomfortable, scared, unsafe, or bored. (And let’s be honest — we’re grown-ups, and we probably struggle with that too.) But when kids feel safe and loved, they are more free to learn! So be strategic about the environments you’re creating for kids. They might just be the key to helping them know Jesus better.

This is a lot to think about and plan for, we know — but if your strategy around creating compelling weekly environments will ultimately help kids get to know Jesus better, then it’s so worth it!

In case you missed it, check out this article about planning an entire year of ministry. It’ll show you how this weekly environments strategy could look on your annual calendar, alongside an annual strategy for your:

We’ve said this before, but we’ve got to say it again! These ideas we’ve talked about are nice … but these ideas only become a strategy when you put them on your calendar and turn them into actions.

When you have an annual plan to turn your ideas and goals into a strategy, you’ll make a much bigger impact.

And hey, if you’re using Grow Kids Curriculum, we’ve already done some of this work for you. For every month of curriculum, we provide a monthly theme that complements the teaching content and includes everything you need to theme your program in our Environment Guides — decor ideas, editable graphics, music suggestions, games, funny characters and sketches, take-homes, coloring pages, and more.

But whether you use Grow Curriculum or not, we hope you’ll steal our strategy! We developed it over lots of years of ministry, with input from lots of church leaders and lots of trial and error. Take it, tweak it, and make it your own. We really hope it helps you be just a little more awesome at what you do this year!

Free PDF Resource
An Annual Strategy for Creating Engaging Children's Ministry Environments
Create engaged ministries for kids with Grow Curriculum's annual strategy for creating engaging children's ministry environments.